SKILL SET
Copied on iPhone.
How use your iPhone to copy original prints using a setup that creates images that only need minimal correction and adjustment in post production.

WRITTEN & PHOTOGRAPHED BY: STEVE HOLLOWAY
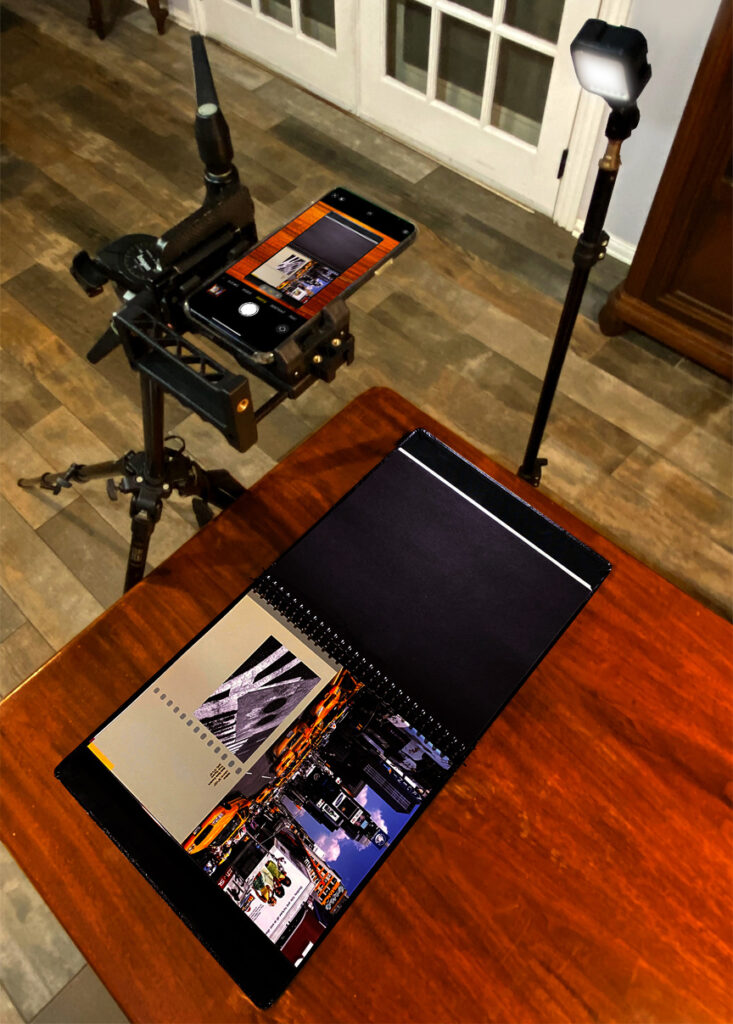
For Copied on iPhone, I used my iPhone 11 Pro Max to rephotograph/copy the Canon 10D Times Square portfolio page images. The images that were originally shot on a Canon 10D in 2003 have now been Shot on iPhone in 2022. (NOTE: The page was removed from the clear portfolio insert for final image capture).
The original Times Square portfolio page combined the Canon 10D Yellow Cab and Manhole Covers images for output on Fuji Photo Paper to use in design firm, ad agency and commercial account presentations.
How the images were taken.
In 2003, I was on assignment, shooting with my first Canon 10 D. During an afternoon off, I walked from our hotel to Times Square. I took a series of vertical shots and was back at the crosswalk light when it occurred to me this is should really be a horizontal image.
Trust your instincts.
I went back and, standing at the northeast end of the center island in Times Square, I saw Yellow Cabs lined up at the lights, waiting to cross. Yellow Cabs. Times Square. Iconic New York. The light changed and I shot frame after frame as they passed by. 10 seconds later it was over.
How to set up for iPhone copy work.
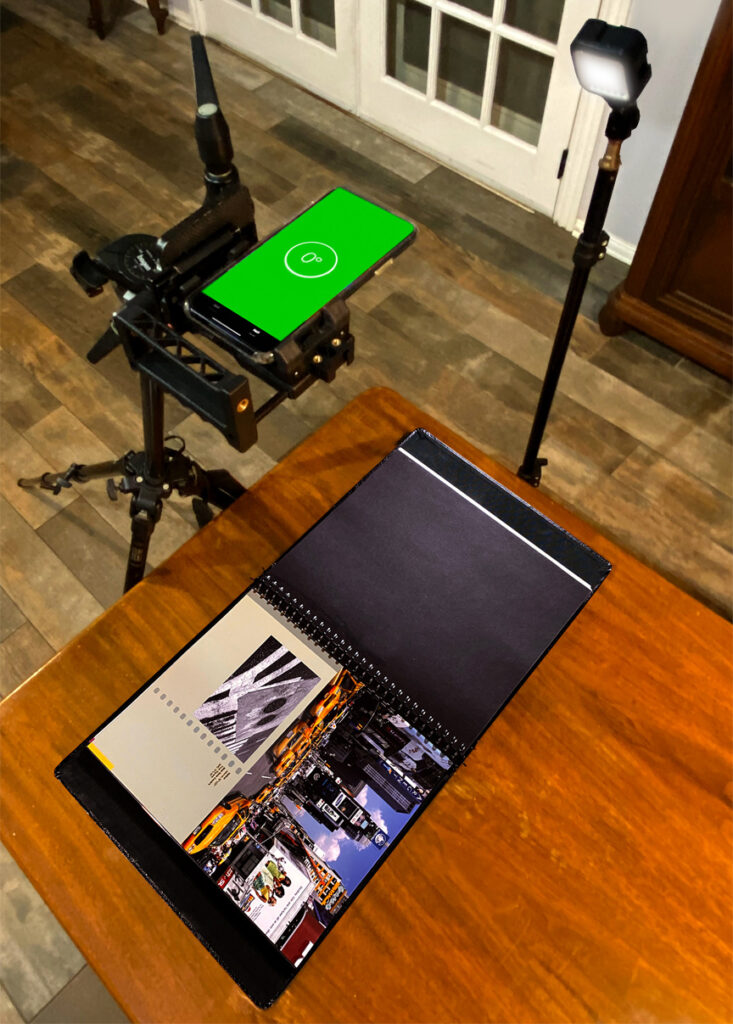
1. Use a tripod. A copy stand costs $500 to $1,500 and takes up an entire counter top. If you do copy work several times a month, it justifies the cost. If you only do copies once or twice a year and have a basic equipment pack (tripod, light stands, LED or similar light source), this is a great work around.
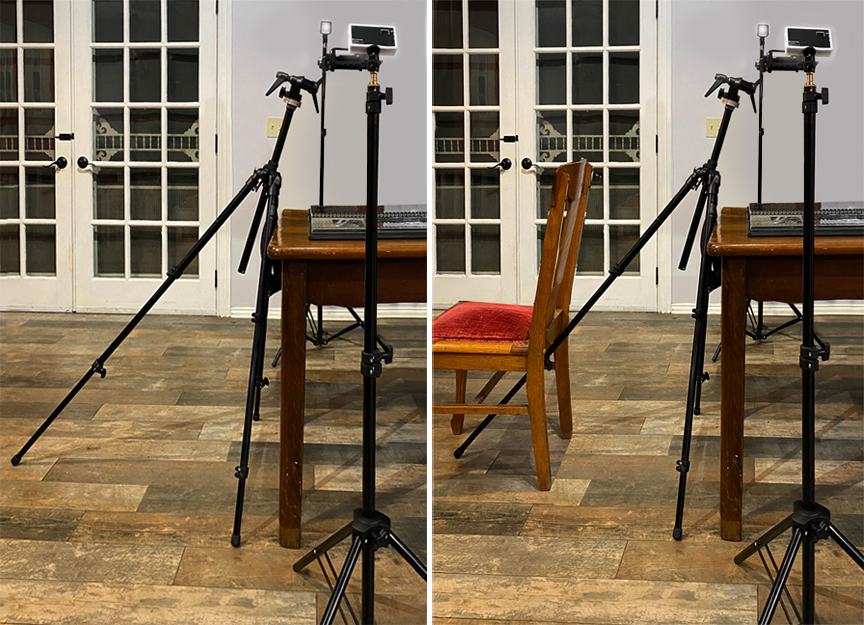
ABOVE LEFT I partially extend two legs of a tripod and fully extent the third. I position the two shorter legs against a table at an angle. When the center tube is extended, the camera position moves out over the table.
ABOVE RIGHT Once positioned, I usually place a chair over the extended leg to stabilize the setup and prevent accidental “bumps”.
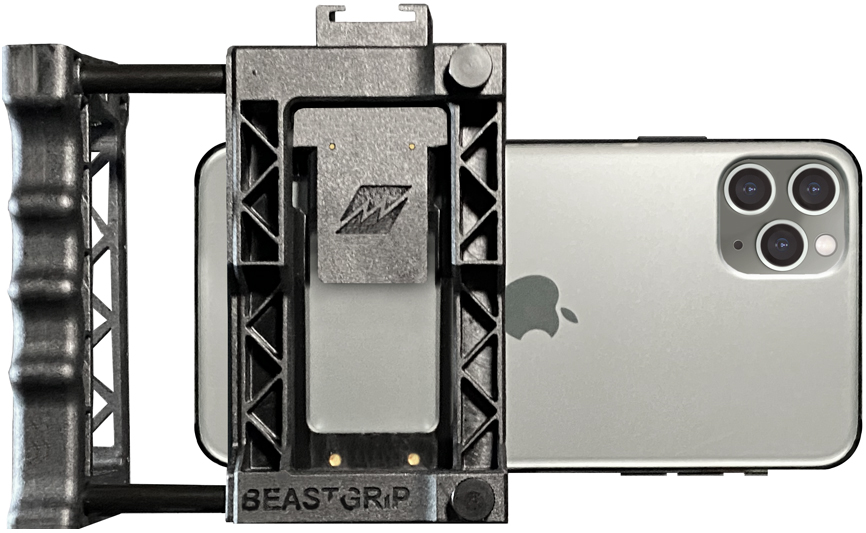
MY iPHONE 11 PRO MAX / BEASTGRIP RIG
You will need to use a grip or clamp to attach your iPhone to your tripod. I’ve used two other iPhone clamps/grips before. One was difficult to confirm the iPhone was locked in place. The other was difficult to spread open and attach.
I first saw the Beastgrip used in Apple’s On set with iPhone 13 Pro video featuring Kathryn Bigelow, the Oscar-winning director of “The Hurt Locker,” and Greig Fraser, the Oscar-winning cinematographer of “Dune” and the Oscar-nominated cinematographer of “The Batman”. Variety magazine characterized Fraser’s work on “The Batman” as “reinventing the Dark Knight’s on-screen presence”.
I saw the familiar grip position (it handles like a DSLR grip) and all of the attachment points for tripods, accessory arms and lights. Within a week, I ordered one.
It’s easy to use. There is a top leverage point you use to easily open the clamp that holds the phone. When you release pressure, two springs close to securely hold the phone.
2. Use the level feature on your iPhone. First, mount your iPhone to the tripod (I use a quick release plate system).
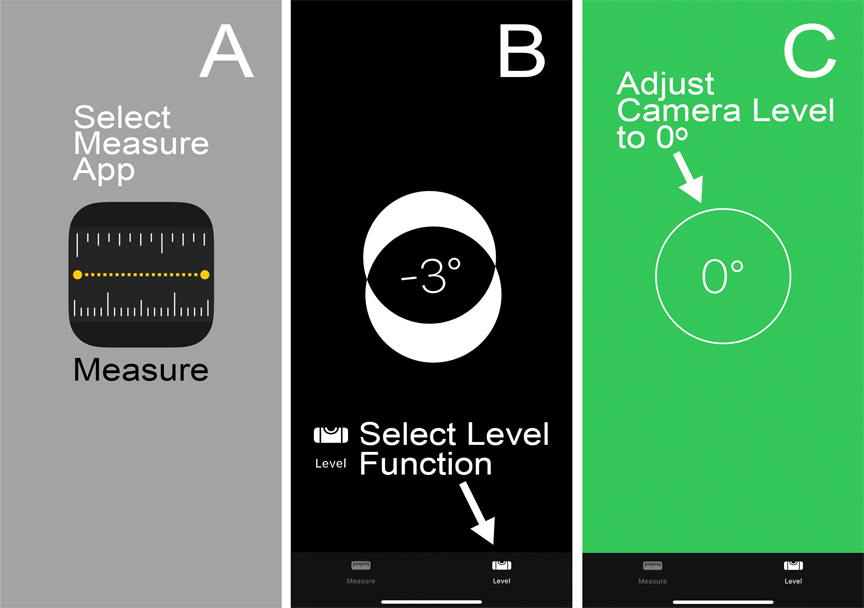
A) Go to the iPhone Measure App. B) Choose the “Level” function. C) Adjust the level position of your iPhone until you get a green screen, “0” reading. Your iPhone is now parallel to the tabletop!
Nothing is easier. Over the years, I’ve used every bubble level device for a camera I could find to verify parallel alignment with the table top and nothing beats iPhone’s level function. NOTHING. No more guessing if the bubble level is attached to read parallel to the film plane. (NOTE: The page was removed from the clear portfolio insert for final image capture).
iPhone’s level sensor KNOWS what the camera orientation is and reads out based on that.
I just finished copying a set of 55 prints and NONE of them required any perspective correction. Every one was perfectly square.
3. Add lights. Place lights to the left and right of the table extended high enough to create a 45 degree down angle. Move lights away until there are no reflections in the copy area. You might be surprised at how little light it takes for copy work. I use two small, camera mount lights set to 5500 degrees kelvin and have plenty of light.
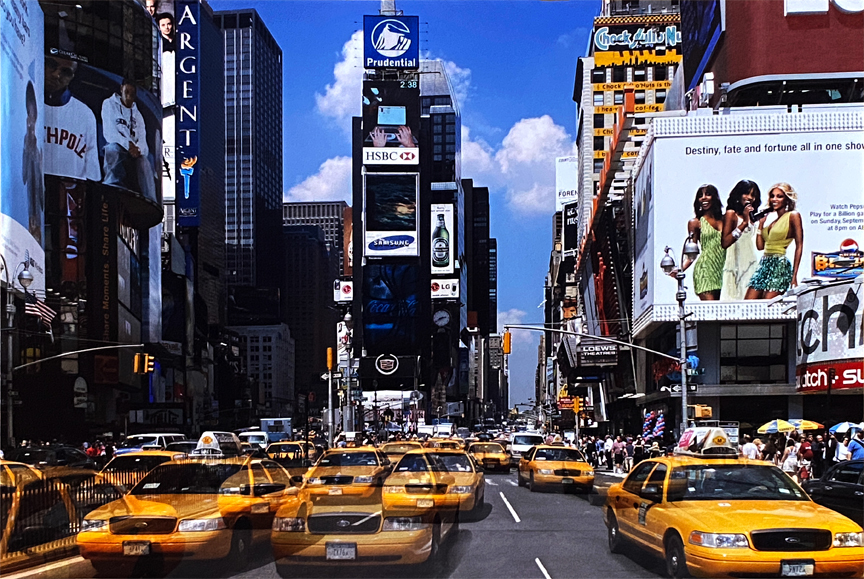
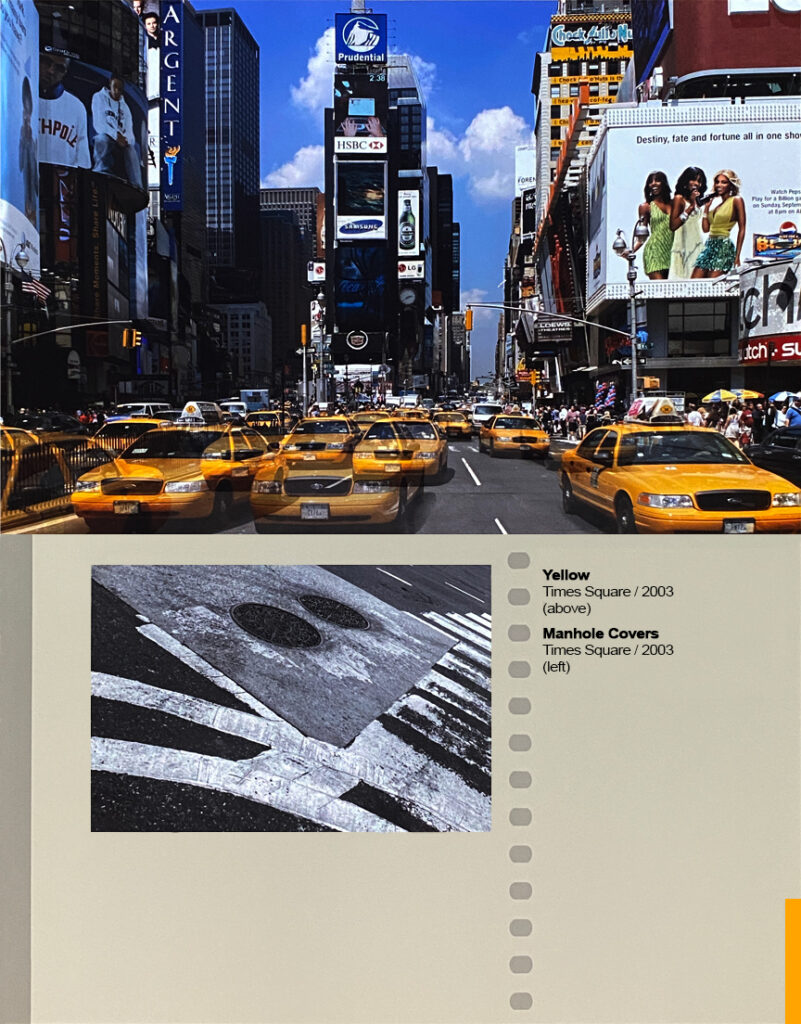
YELLOW / TIMES SQUARE / 2003
This 2003 image, shot on my first Canon 10D, is actually two images combined in post production to emulate a double exposure and create a sense of motion.
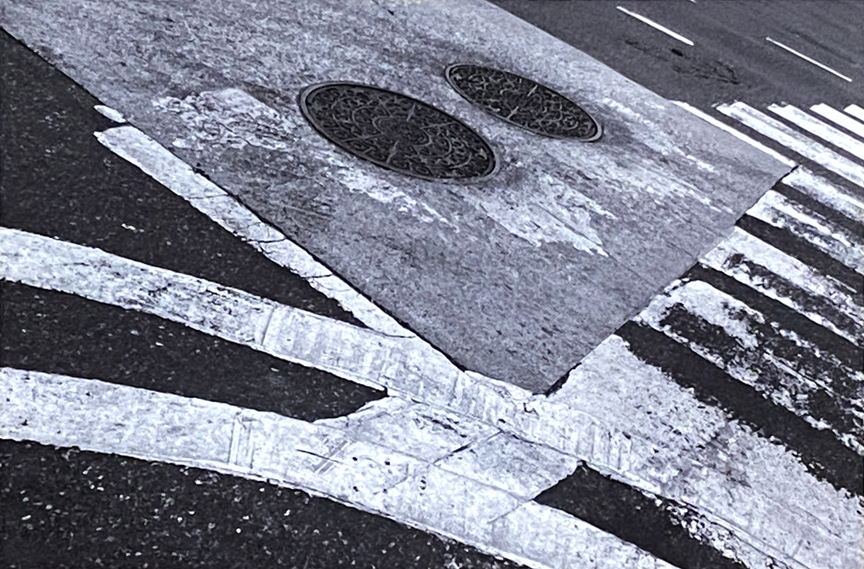
MANHOLE COVERS / TIMES SQUARE / 2003
The images from the Times Square portfolio page, shot originally on a Canon 10D in 2003 were Shot on iPhone in 2022.
#copiedoniphone #shotoniphonegallery


QUICK READ: WALL ART
Look for Wall Art
Wall art has become an integral part of the interior environment of a lot of restaurants, bars, shops and destinations. It becomes part of the experience of being there. Photographing wall art adds that perspective to a visual story.
This steampunk light fixture was captured after an hour wait in line at Burnt Bean BBQ during a cold morning for some of the best BBQ around. Burnt Bean has a unique, chef driven menu. That uniqueness is reflected in their restaurant’s interior and highlighted with procured wall fixtures and art.
Captured on an iPhone 11 Pro Max with Beastgrip and Bluetooth shutter release in natural light. Offloaded to Photoshop Elements for perspective adjustment, clean up and monochrome conversion.

- Shot on iPhone Toolbox [ Homepage ]
- Two Essential Skills [ Change How You Shoot ]
- Two iPhone Features People Take for Granted
- Toolbox How To Guides [ 27 Deep Dive Guides ]
- Translate your Skill Set into a Working Process
- IDEA FILE Shot on iPhone Gallery One
- IDEA FILE Road Portraits One
- IDEA FILE Road Portraits Two
- Digital Evolution
- From The Batman to Shooting on iPhone
- Making the Case For Shooting on iPhone
- Camera and Light Kit Ideas
- Copied on iPhone
- The Power of One Idea
- Becoming Proficient in Post Production
- Designing with Type
- Learning From Cinema
- How the Three Lenses on iPhone Work
- Here are My Influences [ Who are Yours? ]
- Steve Holloway [ Photographs ] Pre iPhone
- Steve Holloway [ Memoirs ]
